Adventures in Composting

So we missed our growing season for this year but we plan on having a large vegetable garden next year. I've starting planning the infrastructure and I knew that we were going to need to buy a fair amount of compost. Our dirt here is very rocky and doesn't have a lot of nutrition. So I started considering the concept of a compost bin.
At our previous house we attempted to compost and it was terrible. We basically did everything wrong because we did not research anything about composting at all. So this time around I was determined to do some actual research in order to be successful and save myself some money.
Step 1: Creating an ideal space for compost
So I've seen many of those expensive plastic bins online and at local hardware stores. I've yet to meet someone who has much luck with these. This is because you need to separate the piles into different stages. and that is hard to do with the plastic bin. An additional reason this doesn't work is that the average family generates more compostable material than those bins can actually keep up with.
Ideally you want a shady space for compost that is out of the way of the normal hustle and bustle of your daily life. This is for a few reasons-1.It's compost so it doesn't smell the best, 2. You actually want the pile to be slightly damp which hard to maintain if you put it in full sun. 3. It's not very attractive so it you can hide it- go for. 4. You want kids, pets etc to leave it alone.
Step 2: Building a compost container
I did a lot of research and the pallet method seems to be the cheapest and easiest way to do this. I've seen some people custom build these out of nice wood but my thoughts on this are- WHY? You are literally going to be putting trash and dirt into it. Why spend the money on that. Also you want to avoid using outdoor treated wood because of the chemicals it is treated with. If you are planning on using this compost for food you do not want those chemicals in your veggies.
We were able to find free local pallets. Ask around for these- they are everywhere. We were able to fit 5 in our car at a time so we had to make two trips. When you inspect the pallets you want to look for "HT" stamped on them. This stands for "heat treated" as opposed to chemically treated. You don't want the harsh chemicals that pallets are treated with leaching into your soil so just be careful!


Using a shovel and a hard rake we leveled out the area that we wanted to put our compost bins as best as we could. We used outdoor decking screws to attach the pallets to each other.

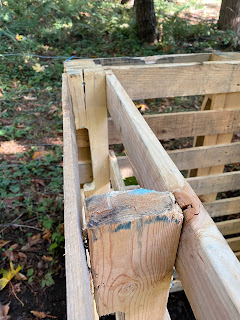
We specifically created 3 "C" shaped bins. Once we get the composting up to full capacity we will have one bin for active new compost, the second bin for more mature compost and the third bin for storage of the "browns" (I'll explain these in a minute). After we screwed the pallets together we debated running a 2X4 through the back of it for stability but decided that it was stable enough. We also placed chicken wire around the pallets in a sad attempt to keep more material inside the bin. I'm debating whether I should add pallet doors to keep animals (mainly my neighbors dog that likes to wander into our yard) out of it.


Step 3: Creating Compost
So what goes in a compost bin?
Lets start with what DOESN'T in a compost bin
- Meat of any kind- this does not break down well and attracts unwanted creatures. Plus bones.
-Any dairy products- with the exception of egg shells. Again these do not break down well
- Pet/ Human waste. Unless you own a cow just no.
-Plastics of any kind
-Seeds- you want to grow stuff in your garden- not the compost bin
The key to a good compost pile is equal amounts of greens and browns.
Greens include:
-Grass clippings (as long as you don't treat your grass)
-Vegetable table scraps,
- Fruits and their peels
- Tea bags, coffee grounds
-Weeds, be careful not to put aggressive weeds because you are literally going to be giving them a great environment to take over- if there is any life left in them.
Browns include:
-Dry leaves,
-Shredded paper (preferably black and white not color, no magazines), or napkins/ paper towels that don't have chemicals on them.
- Shredded cardboard
-Saw dust
-Pine Needles
-Straw that is not treated
So each week we add equal amounts of greens and browns to the pile based on how much greens we've produced that week. Its also good to stir the compost with a shovel or pitchfork each week.
You want your pile to be moist but not soaked. Because it's the rainy season I've put a tarp over our compost but I will most likely have to spray it with the hose occasionally in summer when it dries out.
After that you basically abandon it. It takes time and you just want to add to it and then leave it alone. It takes about eight- twelve weeks just based on your climate.
General Tips:
-We invested in a small kitchen compost bin that has a nice seal so that it doesn't attract critters and stink up the house. These are relatively inexpensive on amazon
- Just build adding to your compost bin into your normal trash routine. For example, our trash comes on Wednesday so Tuesday night we empty the compost bin and stir the compost as we are taking out our trash.
- You will find that you often have more browns than greens. Or that your supply of browns fluctuates with the seasons. This is why we built the third column. We can store leaves (because its fall and we have a ton of them) and other browns here. Each week when we empty our greens we can then take an approximately equal pile of browns and throw them in together.
- For better composting results you want to chop your stuff as thin as possible. Often we will cut our fruit and vegetable scraps before putting them in the bin. Same goes for paper- shred it if possible.


Comments
Post a Comment