How to install a Pre-hung door, slab door and create craftsmen trim

Our door project that felt like it would never end.
Ever since I moved into our new house I hated the doors. They were basic particle board that had been hurriedly painted white. Many of them had holes that had been patched and they all looked like they had seen better days. It was on my list from the get-go to replace them.
Then one day I was at habitat for humanity restore for a different project. Now typically I don't come to this place with high hopes- to me this is mostly a place for people to dump their home improvement trash but I saw that someone had "donated" brand new doors to the store. I came back another day and was able to purchase 4 brand new doors for under $50. I was super happy. I basically got four doors for the price of one.
This began our epic journey to replace all of our upstairs doors and our half bath down stairs. At some points it felt like we would never be done. The most time consuming part was painting the doors. Each door took 4 coats (two on each side) Often I would get a coat in on my day off and then completely forget about it for the rest of the day which really slowed me down.
From this project we learned how to install slab doors, pre-hung doors and how to create craftsmen trim and I'm sharing all of our knowledge with you guys!
How to install a pre-hung door
So what is a pre-hung door? A pre-hung door is a door that comes WITH a doorframe- thus it is pre-hung in the frame. These are typically more expensive compared to buying a slab door (fancy term for door with no frame) because you're buying the frame with it.
We ended up buying a pre-hung door for our half bath because the previous owner had badly damaged the frame. We had somewhat patched it but just decided to replace the whole thing when we went to replace the door.
Materials Needed:
-Level
-Shims
-Hammer
-Pry bar
-Nail gun
-Utility knife

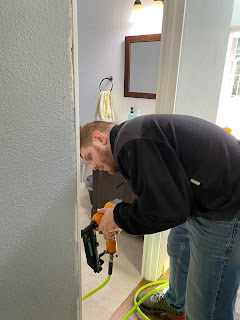
Step 1: Remove existing door and frame and trim
We found this to be easiest with a hammer and a pry bar. We weren't really interested in saving the existing frame so it came apart in pieces.

Step 2: Make sure your floor is level. Thankfully ours was. If yours is not here is a great video as to how to proceed. https://www.youtube.com/watch?v=ZAkGt7xvDUg
Step 3: Dry fit the door frame. We found this easiest to do with the door left in the frame but open ajar so that we could test it.
You want to put a level on either side of the door frame and make sure it level before you begin to nail anything into place. Once the first side is level from top to bottom then you can nail it in.

Then move to the other side and make sure it is level. If it is not level put shims in between the wall and the door frame and adjust until its level. You want to put two shims together coming from either side so that you are applying equal force on the door frame. If you only install a shim on one side of the door frame then you are just slowly twisting the frame over time and that is not good for the frame. Once you get the shims to level you want to nail through the shims so that they stay in place and maintain the levelness of the door frame


Step 4: Test your door. Make sure the door opens and closes without any issues. If you have issues adjust accordingly with your pry bar, shims, and nail gun.
Step 5: Using a utility knife cut the shims so they are flush with the frame and install your trim.
How to install a slab door
A slab door is one that comes without a door frame. They are cheaper than pre-hung doors but harder to install because you often have to cut the door to fit the existing opening.
Slab doors come without hinge cut outs and often without knob and striker cut outs. There are two ways of going about the hinges. 1. You can use a chisel and chisel out the hinges. This is ok if you are only installing one door. If you would like a good video of using the chisel this is a great one: https://www.youtube.com/watch?v=8kAccMi-kGQ

We were going to be adding hinge cut outs to 6 doors and doing that by hand seemed like a really not fun idea. We ended up finding a router at habitat for humanity restore and purchasing it very cheap. Routers range in cost from $50-$150 depending on quality. We debated buying one because we didn't know how much we were going to use it after this project. The one from the restore place was a good compromise for us. We also purchased hinge and knob/striker templates. These come with the bits for making these cuts with the router and are very easy to use. I would definitely recommend investing in these if you are doing multiple doors like we were.
Installation
Step 1: Measure the old door and cut the new door to the exact size of the old door
Step 2: Lay the new door on top of the old door and mark the exact location of the hinges on the new door
Step 3: Using the template and router cut out the hinge slots. If you opt not to do this trace the hinge onto the door and use a chisel to chisel out the area.


Step 4: Dry fit the door. I cannot stress to you how important it is to do this!! There were alot of times that we had to make additional small cuts to get the door to fit.

Step 5: Using the router template and a drill cut the holes for the knob and the template.
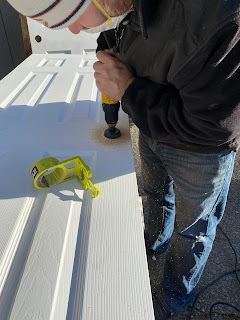
Step 6: Paint the door in the color of your choice. For white I found it needed 2 coats on each side.
Step 7: Hang the door and install new hardware.

How to create craftsmen style trim

So I decided that with my new floors and new baseboard that I wanted my door frames on the main level to be a little fancier than the basic trim. I did some research and I liked the look of the craftsmen style and it was relatively inexpensive.
Materials:
-3 8ft 1x3 boards. You can buy pine boards or you can also find these primed and made from MDF at Lowes or HD. I went for the primed MDF because I'm all about saving time and money. You can also get these wider (1x4, 1x5 etc) depending on your budget and preference
-1 1X2 8ft
-Nail gun/nails
-Wood filler/ Caulk, Glue
-Tape measure
First measure from the floor to the top of the door opening. Cut two of the 1X3's to this size and nail to either side of the door. You want the side pieces to be flush with the top of the door.
We found that there were often big gaps between these side pieces and the wall. We applied liberal amounts of caulk to the gap.

Creating the top piece: We measured from edge to opposite edge of the side pieces and cut a 1X3 to that size and two 1x2s

This is all the pieces for two tops. I painted them before we nailed them together

After painting we nailed a 1X2 to either edge of the 1X3 and then nailed the entire piece to the door frame.

We finished by wood filling all our nail holes and touch up painting.
Overall I'm very happy with how it turned out. It is a little extra cost and word compared to basic door frame but I think it gives it the extra "fancy-ness" that I was going for.
Door Accessories
So my metal of choice is oil rubbed bronze. I always like the contrast of it between the white and the dark oil rubbed bronze.
To save money instead of buying all new hinges I spray painted the existing hinges instead. Rust Oleum sells a spray paint called "Oil Rubbed Bronze" This is passable for things that don't get a lot of attention (Like hinges). To do this I take all the hinges and screws and put them in a card board box and spray paint them. I leave it alone for an hour or two and then I flip the hinges and paint them again.


My spray painting rule is "Don't spray paint anything that people are going to touch." First of all the oils in peoples hands will disintegrate the paint over time and the paint gives the metal a slightly different texture so people will know right away that it was painted. I've seen lots of DIY articles on Pinterest of people spray painting their door knobs- I would say DON'T do this- overtime it will chip and you will not fool anyone. I know knobs/handles are expensive but I would recommend investing in the color and style that you want. In the end this is going to be something that you touch everyday- you want it to be good quality and not have the spray paint fall off it in a few months.


Comments
Post a Comment