Tips and Tricks using heat transfer vinyl with cricut

Heat Transfer Vinyl (HTV) is one of the most versatile vinyls made for Cricut. There is so much that you can create with it and I am always impressed with the different varieties that they continue to come out with for more project ideas.
General Tips
1. As you are designing your pattern consider what you are applying it to- the size of the object obviously and the shape.
2. Not all heat transfer vinyl (HTV) is created equally. Some can be harder to work with than others. I find basic black HTV to be the easiest and glitter HTV to be the hardest. Every time I do a project with glitter HTV I always say- "never again!" but then I do it again. If this is your first project I would recommend starting with black just to get used to using HTV before progressing to harder vinyl.
3. When you go to make your project from design space make sure that you click "mirror" and put the shiny side of the HTV face down. This ensures that when you apply the heat the project comes out forwards and not backwards.
4. I have used a regular iron to do some of these projects but if you plan on doing this on a regular basis I would recommend purchasing a Cricut Easy Press Mini. I had a gift card and purchased mine on a whim and ended up loving it. I feel like the heat control and distribution on it is way better than my iron- or perhaps I just have a terrible iron. I have ended up burning vinyl and fabric with my iron before. A few months after I purchased the mini, one of my friends offered to sell me her Easy Press 2 (the regular sized one) for cheap so I bought it. I honestly prefer to use the Mini and find that it is super versatile.
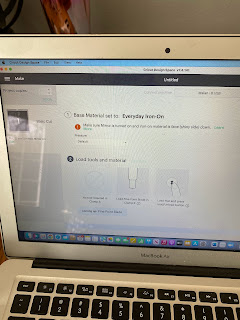
5. Cricut has a great heat guide: https://cricut.com/en_us/heatguide
This allows you to put in your HTV type and material that you are adhering it to. From those inputs it will tell you what heat setting you should put your easy press and how long to apply firm pressure.
Heat Transfer to Fabric
Back in my days before Cricut I remember purchasing "iron on" printer paper that I could print off from my computer in order to make personalized shirts. They were never that great (shocking I know) and the image or words would typically crack or rub off after a few washes. HTV on clothes was one of the things that I was looking forward to the most when I got my Cricut.
My biggest issue with doing projects on HTV is that there are no lines on the transfer paper that help me make sure the image is straight. With permanent vinyl I often cut it to utilize the least amount of vinyl- like for a sign or something. I will weed all the words on a sign and then put them all back in order as I apply them to the wood. I can make sure all the words are straight by using transfer paper with lines on it. Because HTV doesn't have lines on it I have the Cricut cut it as one whole image. I do this by highlighting my whole image before I go to cut it and hitting the "attach" button in design space. Does this lead to more wasted vinyl? Yes, but I would worry that my letters would be crooked and it would look stupid so it's a sacrifice I'm willing to make.
When I make a HTV project I always put it on "mirror" and put the shiny side of the vinyl face down on the mat. Cricut will remind you to do this if you tell it you are cutting iron on.
I have used an iron in the past to apply the vinyl but I have found the Easy Press Mini to be the most versatile.
Here are some things I've made:
T-Shirts- I've only made these shirts recently and it was the first good use I got out of my Easy Press 2. For this I actually bought the file off of Etsy for a few dollars. I found the white HTV slightly more difficult to weed compared to the black- but not as bad as the glitter.

Onesies- I think I'm just at that age. For some reason I find onsies to be the most difficult to have HTV to adhere. Maybe its the thinner fonts or something. Often it takes me a few passes with the Mini before I feel comfortable peeling up the plastic layer.


Masks- I graduated in 2021 and we had to wear masks to our ceremony in order for it to be in person. I figured "well they may as well be cute if we have to wear them" This was my first foray into glitter vinyl and it was a struggle. Glitter vinyl is difficult to weed because it is hard to see where the Cricut cut it and it difficult to separate the waste from the plastic iron on part. As far as adherence goes I didn't have any issues- literally weeding it is the worst.


Luggage Tags
Anyone a Schitts Creek fan? I saw someone at the airport had this luggage tag and immediately thought "I could totally make that!" I bought blank luggage tags on amazon and made them for myself. Again I regretted the glitter vinyl but I had some left over so figured "why not?"

Receipt/Make up bags:
Ok so technically I didn't actually make this one but my friend did for me and I think they are so cute! They sell these blank canvas zipper bags at craft stores and amazon. I think they are great if you want to put someone's monogram on them or a sassy saying.

Heat Transfer to Mugs
So as a "cricket-er" I was always hesitant to touch mugs/tumblers etc. This is because until recently there wasn't a great way to make them waterproof-much less dishwasher safe. No matter how cute the cup is I always feel like if I know I can't put it in the dishwasher I will choose another cup that can.
For Christmas one year a friend of mine got me a mug that was made with permanent vinyl. I wanted to protect the cute vinyl on it. At the time the only thing that I had heard of to do was to apply modge podge. This did work- kind of. It still isn't dishwasher safe but I feel better about using it and handwashing it. However the modge podge left this streaking look on the mug. I think it looks ok because the theme of the mug is winter and snow but I definitely won't do it again.

Then I discovered a trick that changed my whole outlook on making cute mugs- heat transfer vinyl. Now specifically, you need to use FOIL heat transfer vinyl. I'm not sure what it is about the foil but it sticks well and makes it dishwasher safe. Now this is a limiting factor because I've only been able to find heat transfer foil vinyl in a few colors (mostly gold, rose gold and black) but perhaps in the future they will make more colors.
So to make these mugs I designed them in Cricut design space and then turned on the mirror function before it was cut out on the HTV foil.
From there I utilized the Cricut mini press and followed the guidelines from the Cricut HTV guide to adhere the vinyl to the mug,. I found it slightly difficult to make sure all the letters were straight with the curvature of the cup- so I started from one edge of the cup and slowly moved the heat across the mug in order for the design to lay flat.
After I applied the vinyl I preheated my oven to 300 degrees Fahrenheit. I cooked the mug on a cookie sheet for 20 minutes
For some reason the combination of the foil and the baking are the only thing that I found to make it top-rack dishwasher safe.


How to "seal" cups with permanent vinyl on them
So recently someone gave me a cute cup that they had made with permanent vinyl. I wanted to attempt to seal it to protect it. I know it will never be dishwasher safe but I wanted to do a little more to protect it. So I purchased a can of Minwax spray on polyurethane and applied two coats of it to the cup. I purposely tried to avoid the top edge of the cup to avoid any beverages coming in contact with polyurethane. This does leave a little bit of an extra shine to it but you don't see the streaks as much as you do with modge podge.


Comments
Post a Comment