Our Master Bathroom Remodel


Since we bought our house we had talked about remodeling the master closet and bathroom. We didn't like how the closet was laid out. It was very awkward with a door that covered these randomly placed shelves. We also wanted a bigger shower. We arranged for my dad to come and help us because we knew this would be a pretty big project
Before:
When we moved in all the previous owners had done to the bathroom was lay white linoleum flooring and get a new navy blue vanity. I actually really liked the blue vanity but I hated the white linoleum floor. Sure white floors look nice but they are hard to maintain. Here are some before pictures of the bathroom before and the master closet before we started demo.


Step 1: Demo and reframing
We first demoed the closet. We removed all the shelves and removed the walls from behind the shelves in order to expand the shower. We also had to move some of the electricity and we built a frame for our eventual pocket door.
You want to wear masks when demoing whenever possible. Who knows what kind of dust and crap has been sitting in your walls for however many years


Demoing the bathroom we removed everything and used a multi-tool to cut up the subflooring. From there we framed out the new shower and new shelves that were going to be in the new closet and the new bathroom.


Step 2: Framing, Installing the plumbing, and putting up cement board for the new shower
We reframed the walls for a bigger shower. We also framed out a space for additional shelves to the left of the shower (can you tell I'm obsessed with storage space opportunities). We purposely added 2x4s on each end of the shower to provide the shower doors with a good support system later.
The pex installation on this was quite painless since we had learned how to do it in our other bathroom. What proved to be the biggest pain in the butt was the shower pain installation. The drain ended up not lining up correctly and we ended up having to cut a hole in the ceiling in our kitchen in order to get them installed correctly.


At this point we installed niches that are ready to have tile applied to them. Even though they can be a pain in the butt to tile I LOVE these niches. They are always so neat and functional when they are complete. The last shower we installed with niches I ended up having to move them because there was a giant pipe in the way. This time I was able to place them where I wanted.
It's hard to see in these photos but we also built in some small 2x4 pieces to give the bench that we planned to put in more stability. We also double checked that we had adequate insulation between our exterior wall and the shower.

From there we installed 1/2 inch cement board. It's important to put thicker cement board in a shower compared to a floor. This is because floors having gravity working for them to keep the tiles in place whereas showers have gravity working against them.
One thing I always do to save money is just to use a basic white shower pan instead of purchasing one that you tile. I know this makes it not as fancy but overall I think it is a better deal. First of all alot of the accent tile that goes on the bottom of showers is super expensive, and I don't always find it that comfortable/safe for my feet. Second of all a tile-able shower pan is more expensive by-itself forget about the tile. Then you have to consider sealing the tile really well because it will be constantly bombarded with water.
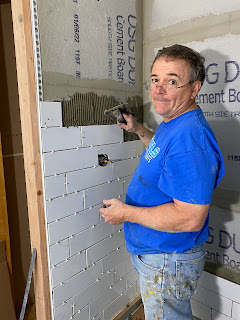
Step 3: Tile the Shower, Install the trim kit and install the shower door
This was pretty time consuming. It took 3 of us a whole weekend. Part of this was because it was on the exact opposite end of the house from where we had the tile saw set up. My dad stayed up stairs and was primarily in charge of applying the tile. Max was downstairs in charge of cutting the tile. I was the runner who went between the two and communicated the needs for cuts. It worked well but it was still time consuming.
I picked an oversized white subway tile. I liked the simplicity yet the the maturity that it brought to the space. We noticed that the length of one tile was equivalent to the width of three tiles. It specifically said in the installation instructions that it was not recommend to just do a 1/2 tile stacking pattern as we had done with previous subway tiles. It said that this style was not very structurally strong. Because of this we decided to stagger the tile in a third system. The first row we started with a whole tile, then the second row 2/3 of a tile and the third row 1/3 of a tile and repeated it all the way up the shower. We found this worked well and was aesthetically pleasing.

One thing that I didn't like on the previous shower that we tiled in our old house was the ends of the shower tile. I felt that it had a very rough and and unattractive edge. This time around I found this plastic edging that was very cheap from home depot. We measured and stapled it to the cement board at either end of the shower. We were able to tile directly on it and it gave us a straight polished edge. I am so glad that I found this. You could also use edging tile but this ended up being a cheaper option for us.


For the niches I picked a herringbone accent tile that came in 12 x12 sheets. We cut the sheets to fit our opening and Max had to cut some tiles in to smaller pieces to continue the pattern. One thing that I did differently from this shower was to purchase edging tile to go around the niches. I am so glad that I did this. It gives it such a polished look. I didn't think to do that in my last shower and it always bothered me because the edges looked so rough.


The Completed Shower:
After a few days I applied a grout sealer to the grout in the shower. I think this is important because this is such a high humidity area. The sealer takes 24-72 hours to fully seal.
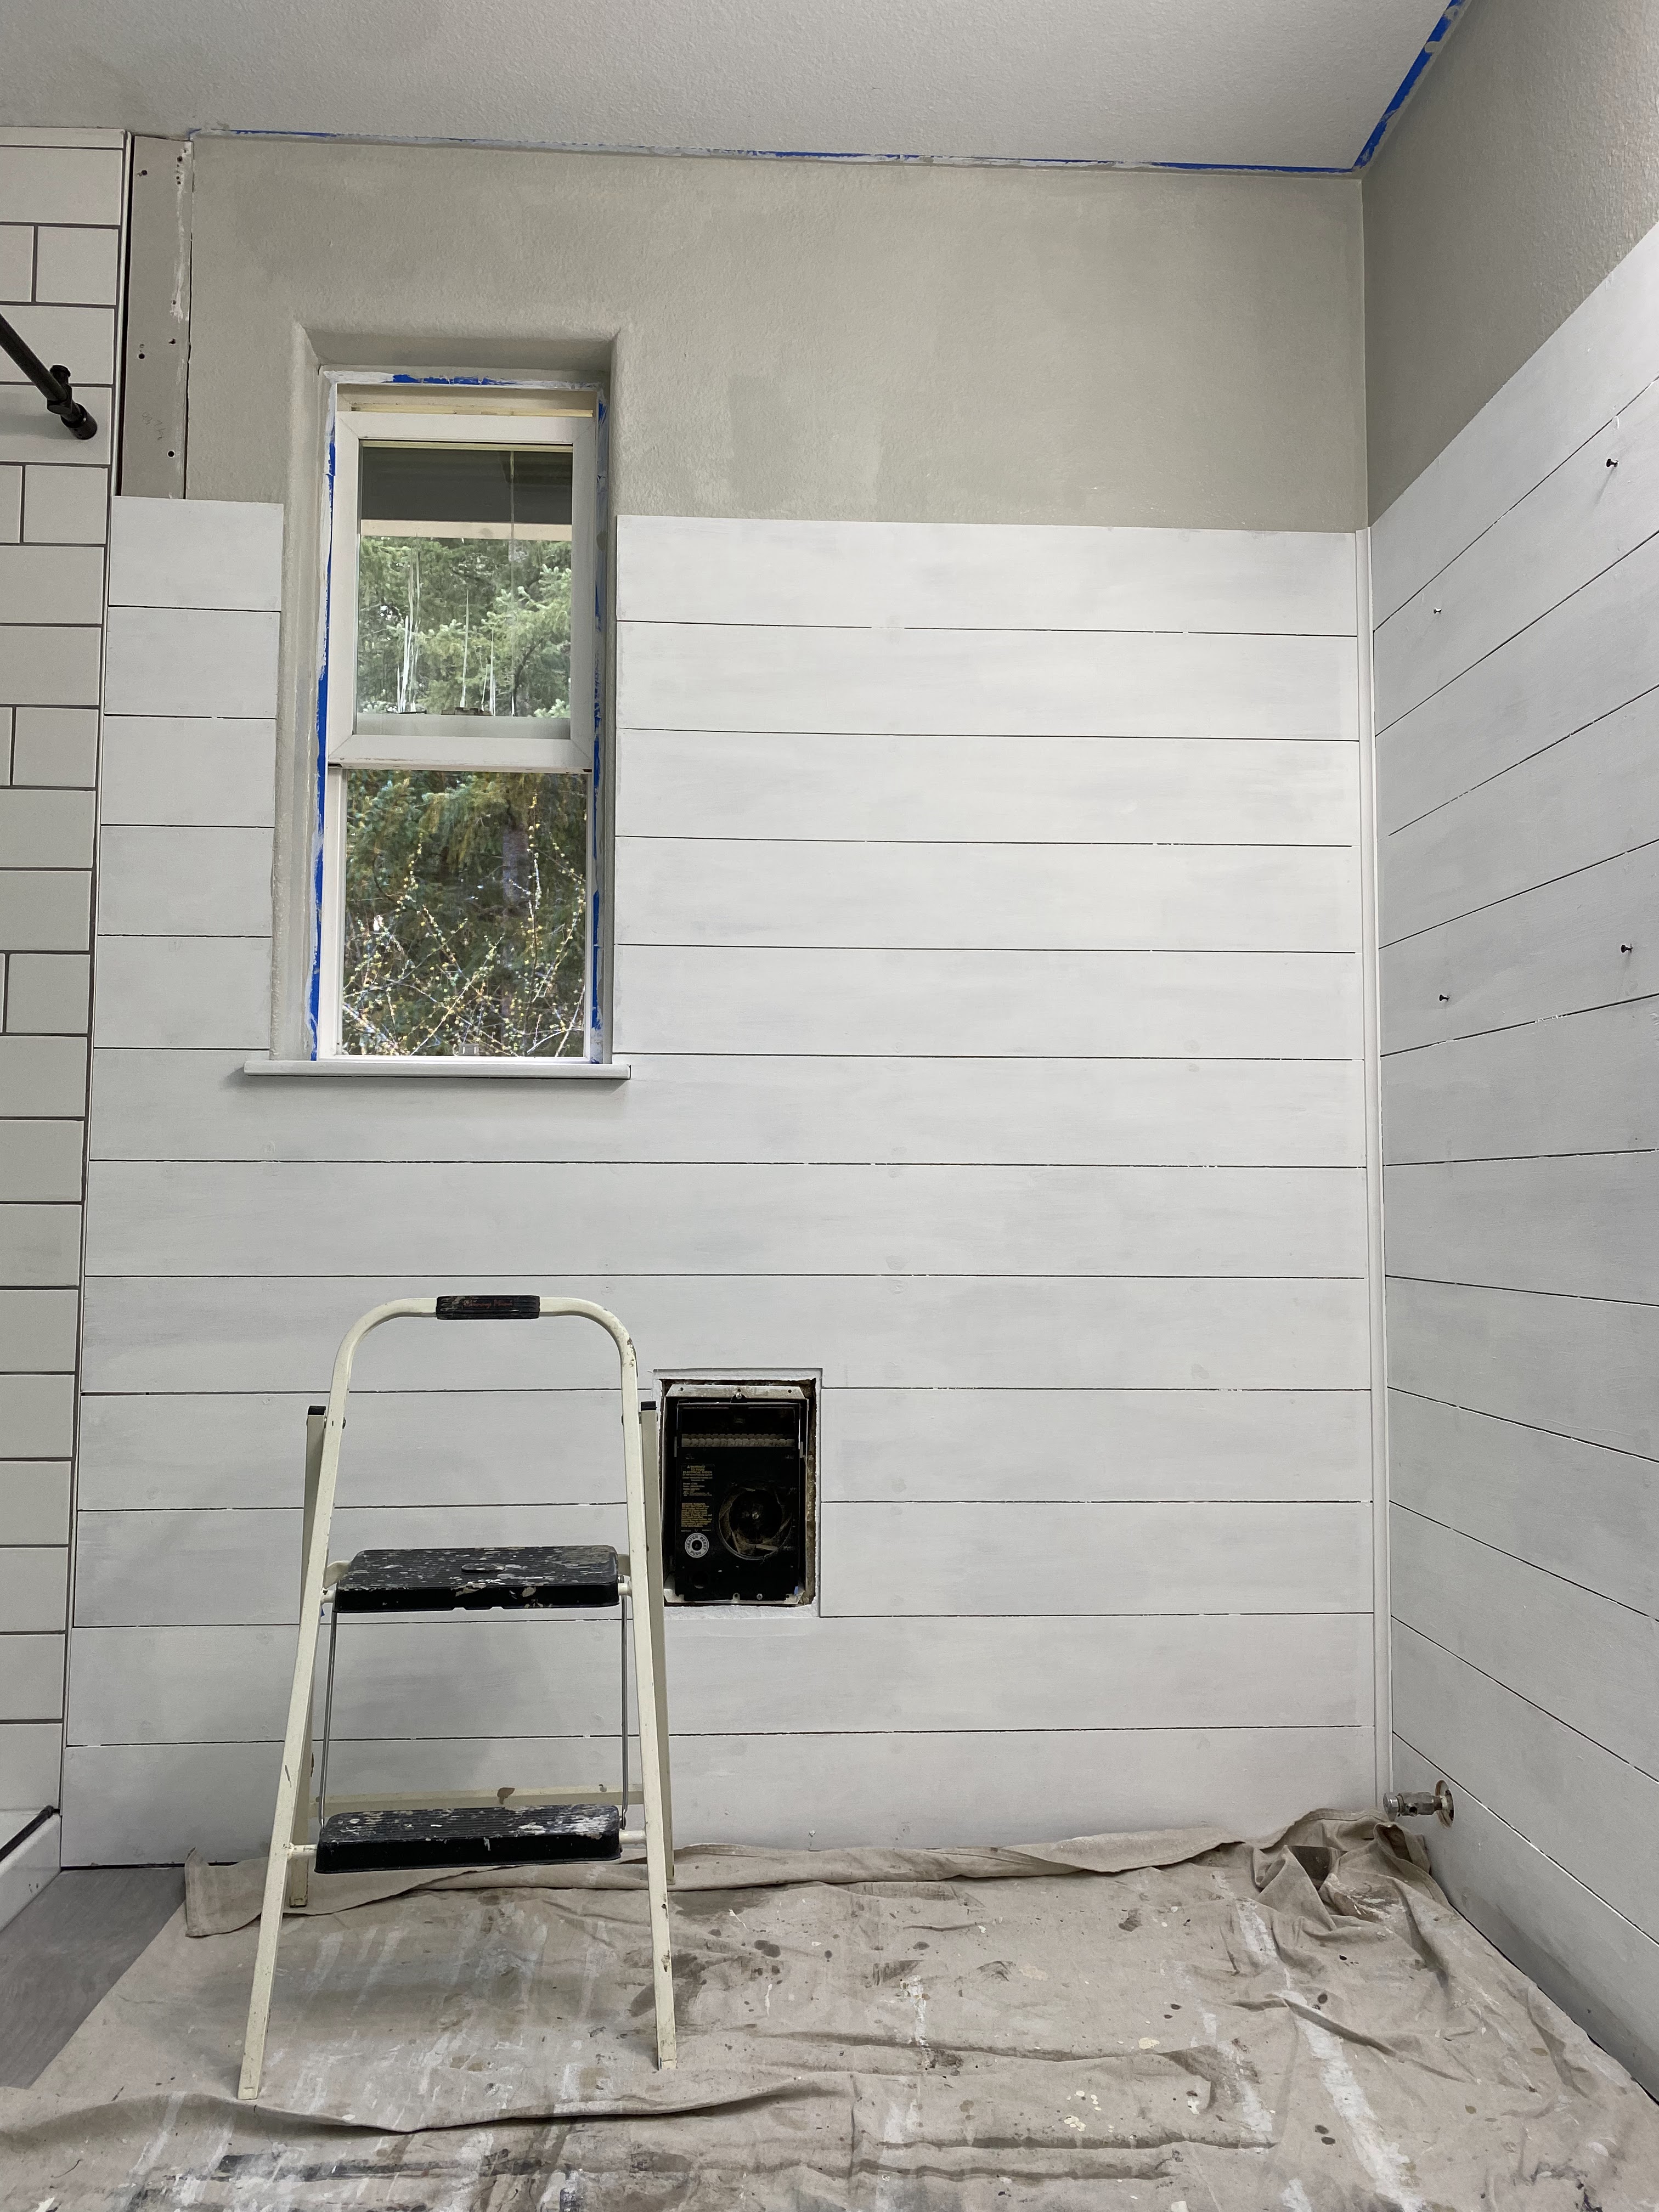
Step 4: Apply Shiplap.
I decided that I wanted to Shiplap the wall in this bathroom 3/4 up. We decided to at least apply the bottom row of Shiplap before we laid the tile so that the tile could lay next to the ship lap and not below it.
To get a full tutorial on how to ship lap check out this blogpost https://craftytravelgirl.blogspot.com/2022/05/diy-shiplap.html
We decided to save some shiplap and not apply it behind the sink and not in the built in shelves. 3/4 of the walls were already white but I decided to roughly paint the stupid blue accent wall with white paint so that it wouldn't show through in the gaps when we applied the ship lap.
The shiplap after we cut it with a table saw and as I was painting it. You can paint it on the wall if you want but I had some time off when my husband wasn't home so I decided to get a jumpstart and paint some pieces ahead of time.
The blue wall before and after I painted it.


After we finished applying the shiplap I painted the rest of the wall "Repose Gray" from Sherwin Williams
The completed shiplap and painted wall
Step 5: Apply the Cement board and tile the floor
We used 1/4 inch cement board for the floor. I went back and forth on a tile selection for this room but ended up using the same tile as we used in our main bathroom remodel. Part of this was because we were time constraint and there were a lot of supply chain issues. The other reason was that I liked the tile and I liked that it tied the house together.


Step 6: Drywalling, Mudding & Painting
We applied drywall to all the new walls and began the terrible process of mudding. Apparently I only took one picture from this whole process even though it felt like it took forever. Drywalling and mudding drives me crazy because it is so messy!!! Dust literally gets everywhere. And it's not like its just one day of mess-at minimum its three days of mess. We also applied the spray texture which we weren't super thrilled with but thought that it help blend the old walls and new walls better than nothing. It looked better once it was painted.
We painted all the areas that we did not apply ship lap "Repose Gray" from Sherwin Williams. I debated this color for awhile- originally I considered doing a navy blue to compliment the vanity but in the end I was glad I chose a more neutral color.

Step 7: Pocket Door and Trim
Originally before we applied the drywall we installed a pocket door in order to save the most amount of space. We purchased a pocket door kit from Home Depot. I debated between a metal kit and a wood kit and decided to spend the extra money on the metal kit because it was a little more sturdy and it also had a soft close option ( I love me some soft close doors!!).
We bought a basic 6 panel slab door and I painted it white to be installed as the pocket door. We had a hard time figuring out how to trim the door to hide all the metal- but in the end I was happy.
We also applied new trim in the closet, bathroom and finished trimming our master bedroom from when we had started last year. I always love applying trim- it just makes a room feel so finished!

Step 8: Installing floating shelves in the bathroom and closet
I'm doing a separate blogpost on this but we created floating shelves in our bathroom and on the opposite side of the wall in our closet. This was a very simple, low-cost project that gave us so much storage space. Our house is desperately lacking in storage so any additional space that I can add I always do. The shelves are stained Minwax Jacobean (my favorite stain color).
See this blogpost for more detailed instructions_____


Step 9: Vanity Backsplash
This ended up being our last major task in this bathroom. I somewhat dragged my feet on this because I wasn't totally sure what I wanted. We had left over tile from the shower so I originally considered just using that but I felt that they were too big from the small space. I also considered purchasing more of the herringbone backsplash that we used in the shower and using that- but it was such a pain to cut into square shapes with tiny pieces that my husband immediately vetoed that. Overall I knew it needed to be something that quietly complimented the space rather than stand out because we already had so much going on in the space already. I ended up finding this small neutral subway tile while we were at Home Depot and I really liked it. I felt it complimented the shower and it complimented our backsplash in our other bathroom well without being the exact same thing
The installation was very easy- we used premixed mastic and applied the tile right on top of the ship lap. Max used an angle grinder to cut it rather that dragging out the entire tile saw. We let it sit for a day and then grouted it with white grout. I think it turned out great!!


Finished Pictures and Overall Thoughts
Overall I am so happy with how this turned out. It took A LOT longer to complete than I thought it would. We started this project in the beginning of March and didn't officially finish it until the end of May. Part of this was because we were both working full time for most of it. The hardest part by far was the shower. I was so glad that my dad was able to help us- it was for sure a three person job.


Comments
Post a Comment