So our half bath. It's our only bathroom downstairs and does get a lot of use by guests and when we are too lazy to go upstairs. It was never a bad bathroom by any means- you could tell that it had been a cheap and quick flip by the previous owner- cheap flooring a new vanity and painting to hide mistakes.


When we redid our main bathroom last year (See this blogpost https://craftytravelgirl.blogspot.com/2022/07/our-main-bathroom-remodel.html ) we took out the chimney that ran alongside it and created a closet for storage. This helped us immensely because there is very limited storage space in our house and I am always looking for ways to create more. Because we took out the chimney on the second floor we wanted to redo the fireplace on the first floor. We were told when we bought the house that the fireplace was un-useable and would require thousands of dollars to repair and then yearly upkeep. I don't love the idea of having a live fire in my house- especially now with a baby. We decided that it was better to remove the existing fireplace and replace it with an electric fireplace insert. This way we would have the heat and ambiance of a fireplace but without the fire hazard. By removing the existing fireplace we gained so much more space and decided to make it a small closet for storage space in the half bath.
Step 1 Demo
We removed the sink, toilet, floor, wall and fire place insert. This was relatively quick but made a HUGE mess in our house.
Step 2: Electrical
We needed to run an electrical line in order to plug the fireplace in. We also wanted to put a motion sensor light in the closet so that when you walked in the light would turn on. In addition to this we got kind of a crazy idea. We are eventually going to move our tv to over the fire place but I didn't want the extra junk (dvd player etc) to sit on my nice new mantel. Max was able to run wires so that we would plug our dvd player and other stuff in the wall in the closet. The remote signal works through the wall (we checked multiple times). We also got very lucky with running the plug for the fireplace insert. Originally we thought we were going to have to hire an electrician to run a line from our breaker box to the insert but we actually found a line on accident in the wall that we were able to use. Next to the fireplace was this light switch that we could never figure out what it did. It drove my father crazy trying to figure it out. When we opened up the wall we found that the switch went to a fan that was underneath the fireplace. Because we removed the fireplace we were able to use the electrical line from the fan to plug in our fireplace insert. One of the only times I feel like we actually found something that saved us money. Usually I feel like we find things that cost us money.


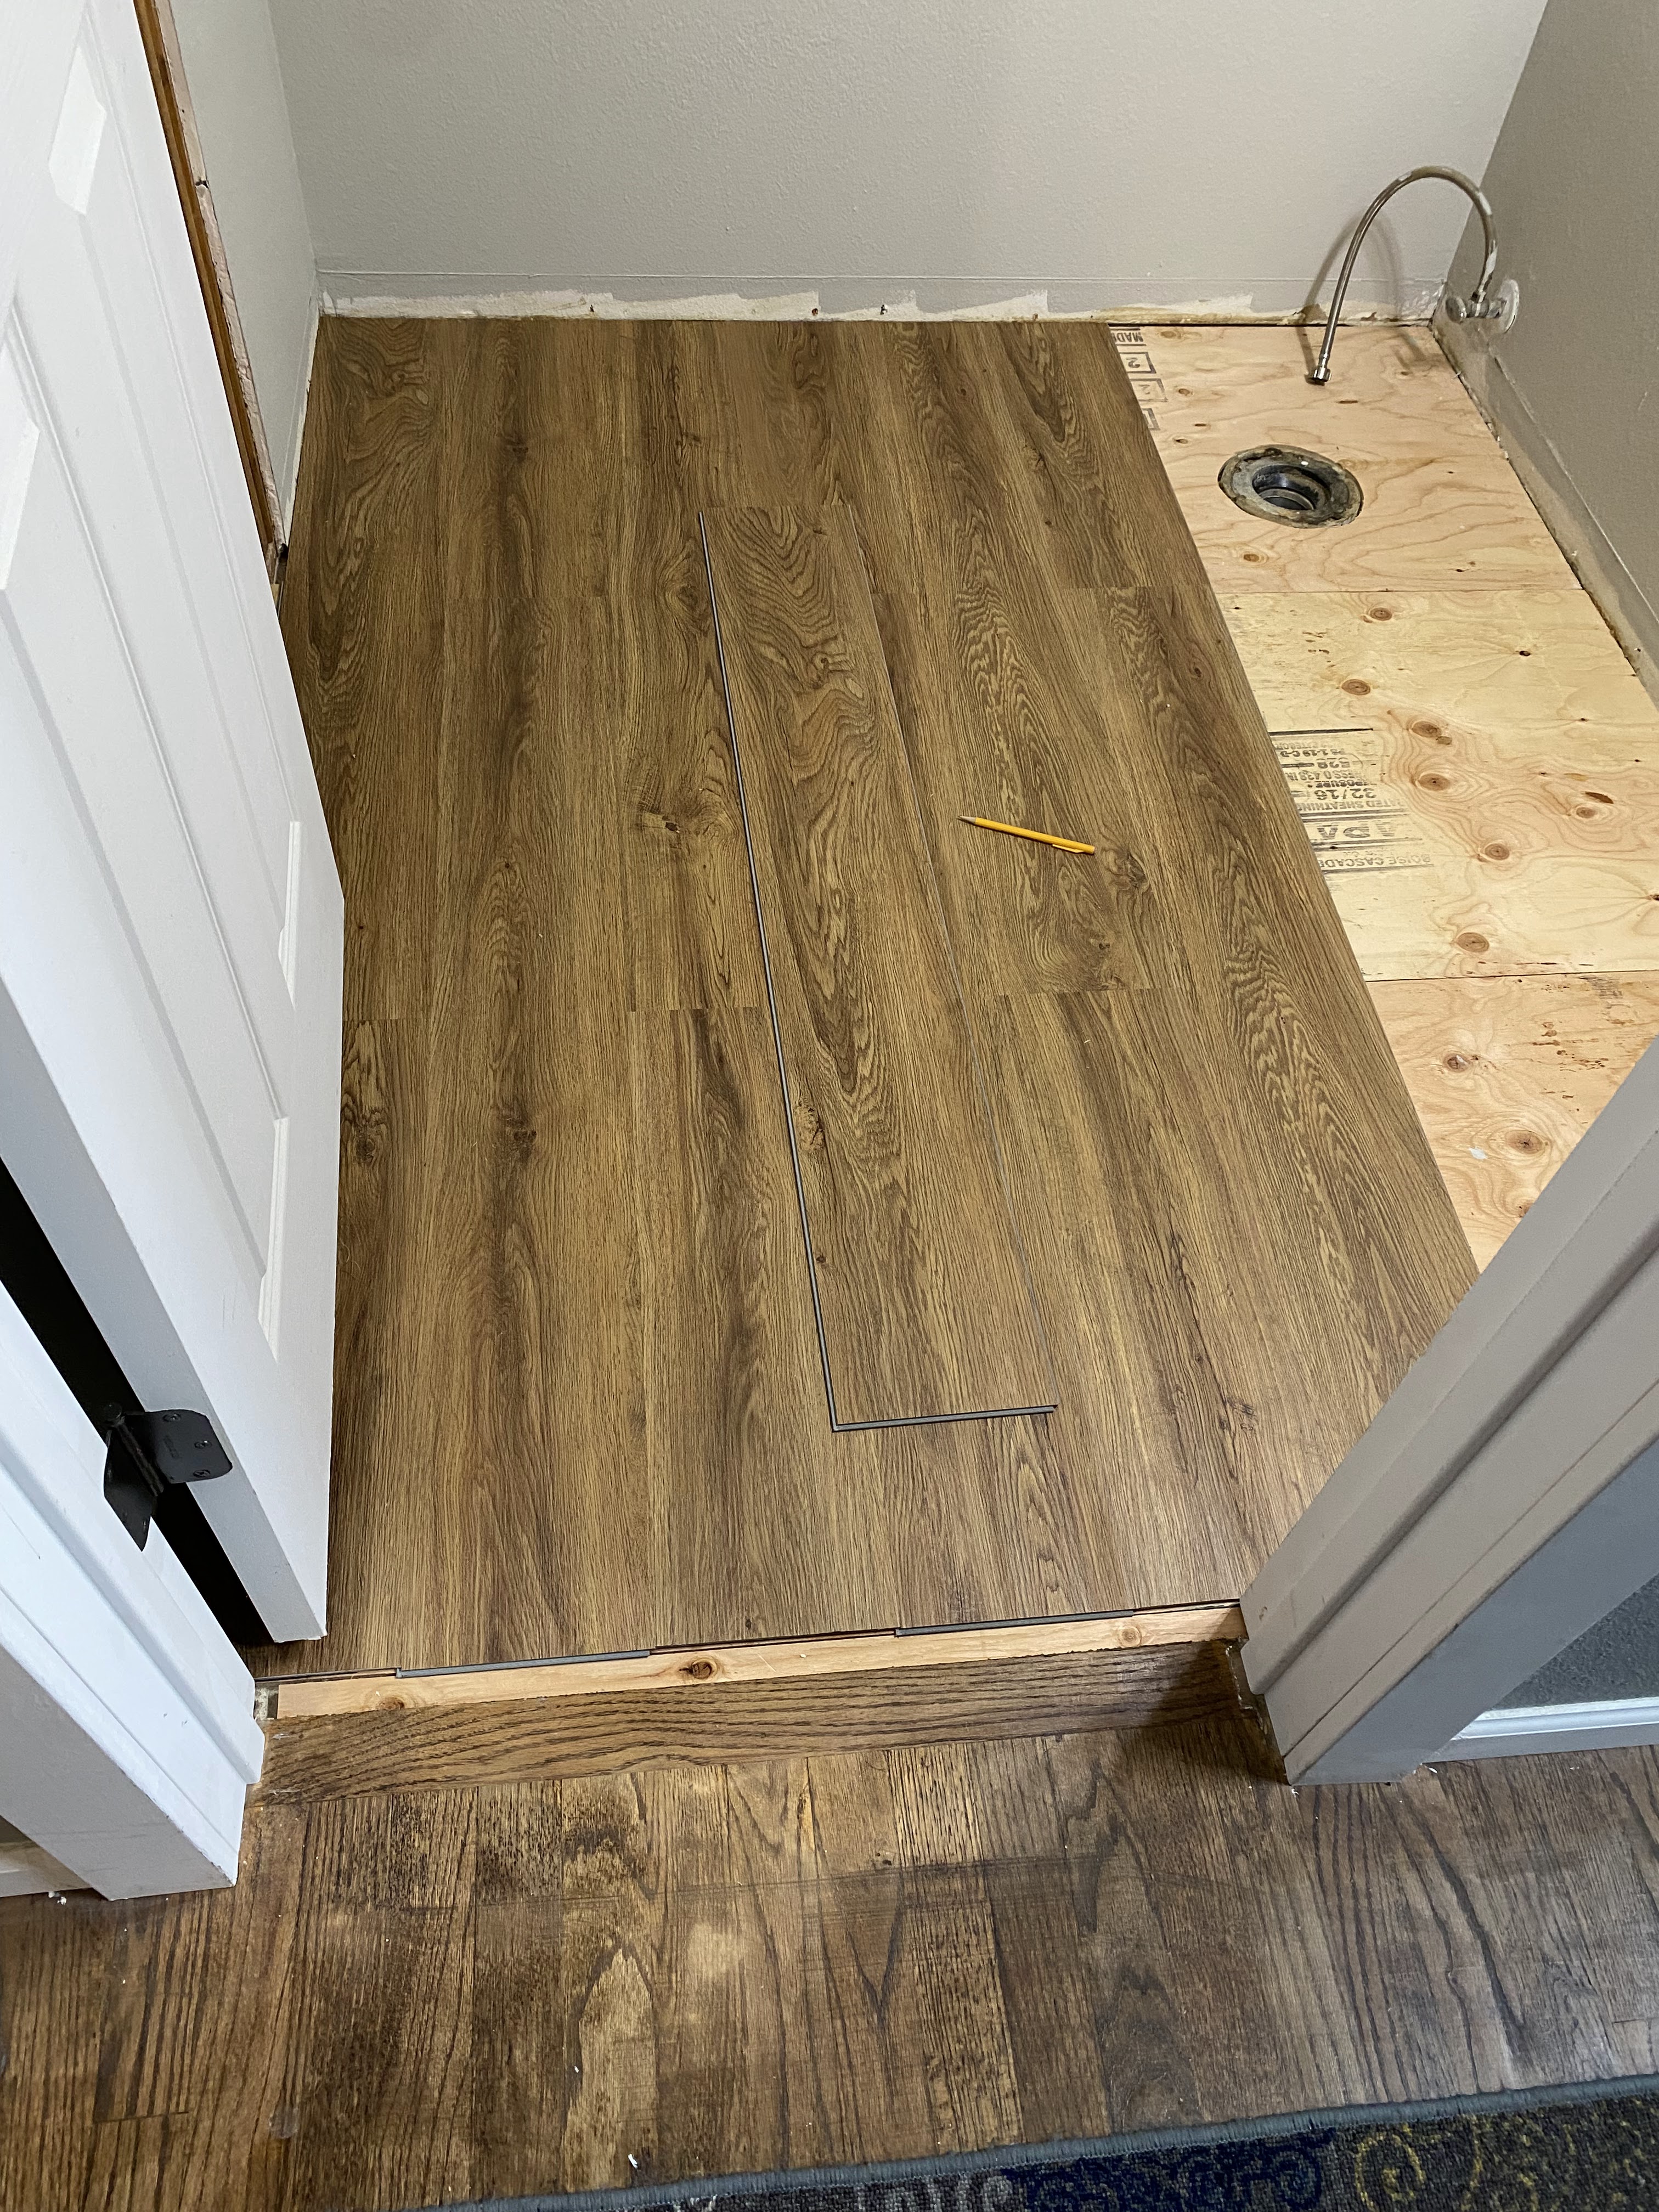
Step 3: Flooring, Drywall and Paint
After the electrical was completed we put down waterproof laminate flooring. I went back and forth on this decision for a long time. I wanted whatever we put in the bathroom to be the same that we are going to put in our kitchen/living room when we redo it this summer. I don't like when you walk in a house and there are 3 or more different types of floor- it feels to patchwork to me. I wanted water proof laminate because 1. It's a bathroom which is a high water area 2. I have a baby- just basically a giant mess maker. I debated whether I should get something that looks similar in color to my existing wood floors or if I should do a gray instead. In the end I decided to go with the brown that is similar to my wood floors. I figured most people aren't crazy like me and won't be paying that much attention and I am going to do gray cabinets and thought it would be too much gray with gray floors.

This is the laminate floor- you can see it in comparison to my exisiting hardwood oak floors. Hardwood was no way an option for this. It just doesn't make sense for our family right now- I could just see it getting damaged plus it is so much more work to install and maintain. Plus I love that this is waterproof- if my kid spills something on it or my toilet leaks- no big deal I can just clean it up and not worry about the floor.
After the floor we installed the drywall and mudded (ugh I hate mudding it is so so messy). After the mudding was dry I painted the whole room "Repose Gray" from Sherwin Williams. It is my go-to gray because I am terrible at picking paint colors and it is always gray- it doesn't have weird undertones that make it look different colors in different lights.
Step 4: Installing Trim, Vanity and Toilet
After the paint we were able to install the trim. This is a tedious process but man does it make a world of difference! After the trim was installed then we installed the sink vanity (purchased from Lowes) and toilet. It was so nice after 2+ months at this point to have a functioning bathroom downstairs again!!
Step 5: Building and Installing the double barn doors
We decided to build double barn doors to hide the closet from guests who are using the bathroom. Because of the wall space we didn't have enough room for a single pocket door and needed to use two that open to each side. This ended up being quite and ordeal because the track for the barn doors was slightly too long and we had to cut it. Eventually we got it to fit. If you want a more in-depth account of how to install a barn door check out this blogpost: https://craftytravelgirl.blogspot.com/2022/02/how-to-build-and-install-modern-barn.htm
Step 6: Adding the backsplash and finishing touches
I chose a simple square tile that wasn't too busy with the counter top to use as the backsplash. I also decided to go with a circle mirror in this bathroom just to have something different downstairs. We also installed floating shelves in the closet. We also took a shelf that we were using in our kitchen and installed it in this closet because we knew we were getting rid of it when we re-do the kitchen later this year.
Overall
Overall we are really happy with how it turned out. I want to be really honest with this- it took us a while- but we knew it would. This was a slow project for us- it probably could've been completed a lot faster but we just had to do it with little chunks of time. A few hours every weekend or a little bit during the week during nap time. We purposely planned it to be completed when we knew people weren't coming to visit us. We are so happy with all the extra storage on our main living area.


Comments
Post a Comment